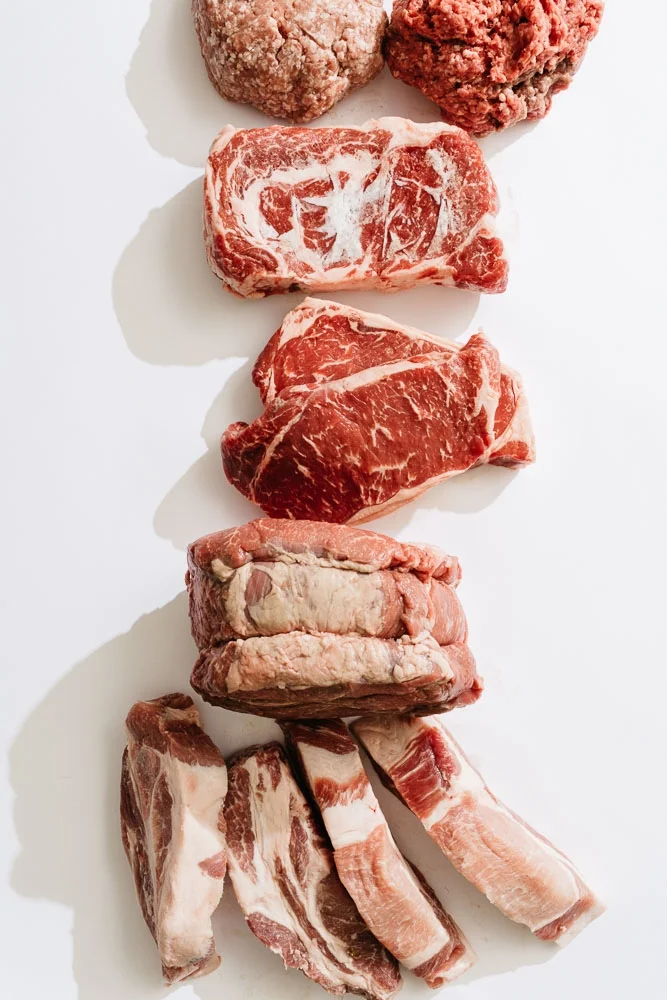
Local Meat Primer

Photo by Michael Piazza / Styled by Catrine Kelty
As the availability of local meat increases, through farmers markets and meat CSAs, more people are buying second freezers, exploring unusual cuts and experimenting with new cooking techniques. There are lots of reasons for these trends, which are especially strong in New England. As the wife of a farmer, and an advocate for local and sustainable food, I know well that buying meat raised locally helps support small-scale regional farms, and it tastes much better than the industrially raised meat found in a typical grocery store. But many people new to buying meat directly from a farmer—which is almost always sold vacuum-packed and frozen—find that dealing with this new product can be intimidating. They receive cuts of meat that they aren’t used to buying at the supermarket, and aren’t familiar with thawing and preparing them. Here are some tips to help you source local meat, store it, thaw it and cook it like a pro.
WHY BUY LOCAL MEAT?
Meat raised on pasture is much more delicious than factory- farmed meat. Because it has traveled fewer miles to get to your plate, and generally was raised outdoors instead of in a large concentrated animal feeding operation (CAFO), the meat you find from New England farmers is more sustainable for the environment. And despite its bad reputation, red meat is actually quite healthy.
Red meat from pastured animals is one of the best sources of bio-available iron. It’s also rich in B6, B12, thiamin, riboflavin, pantothenic acid, folate, niacin, selenium, choline and zinc. Organ meat is especially nutrient-dense when it comes to vitamins and minerals. Grass-fed beef has significantly more omega-3 fatty acids than feedlot beef (although wild salmon is an even better source of this important nutrient). Grass is rich in vitamin E and carotenoids, and cattle that graze on grass store beta-carotene—the precursor to vitamin A—in their fat and milk, making the fat in grass-fed beef more nutritious, and more yellow, than grain-finished steak.
HOW TO SOURCE LOCAL MEAT
In the Boston area, most farmers markets now have at least one vendor who sells local meat. There are also several farms that offer their meat directly to customers, or people can opt for the new trend of local meat delivery services. Eatwild. com is a great resource to connect directly with a producer. Be aware that New England meat “season” is generally late summer through early winter, so if you’re interested in a onetime meat share, be prepared to receive your dividends then. Also, local meat is generally sold frozen and in bulk, which means less waste for the farmer.
BUYING A WHOLE ANIMAL
If you’re up for saving some money and investing in a whole animal, most farmers sell them by the “hanging weight,” which is the weight of the animal without the head, hooves, organs and hide. Once the majority of the bones are removed and the animal is butchered, the weight of the meat you’ll receive is less than the hanging weight. For pigs and lamb, finished cuts are about 70% of the hanging weight. Cattle return about 60–65%, and of this, 30–40% will be in ground meat. If you’re considering buying a whole animal, you can expect about 350–400 pounds for a whole cow, 110–150 for a whole pig, and 30–50 pounds for lamb. A whole lamb takes up about one standard-sized freezer (above a fridge), and a 20-cubic-foot stand-alone freezer can fit the meat of about two pigs or one cow. (Please note that most farmers do offer half and quarter animals for those seeking a smaller investment and less to store.)
When buying a whole animal, you should be asked for your choice of cuts, whether or not you want to receive any lard or organ meats and if you’d like your meat wrapped in paper or plastic. Vacuum-sealed plastic is preferable to paper because the meat will be less likely to dry out and it makes thawing easier and less messy. Well-sealed meat will last over a year in the freezer with the exception of bacon, which should be eaten within six months.
DO SOME RESEARCH
If at all possible, visit the farm your meat comes from. Walk around. Are the animals actually being fed and raised according to how they’re marketed? Are the chickens on dirt or fresh grass? Fresh grass is a better and more natural environment for chickens. Are they making lots of noise and pecking around for bugs? Noisy, pecking chickens are happy chickens! How about the cattle? Do they spend their time on the same piece of pasture or are they rotated to new grass often? And when the time comes, how and where are they processed? When you are investing in a meat share, visiting the farm for yourself and asking questions is the best way to ensure your investment will live up to its marketing promise.
HANDLING LOCAL MEAT
How to store
I have a dedicated “meat freezer” at my home. Chest freezers are more energy efficient, but I’ve found over the years that I prefer an upright freezer because I can easily see and grab the cuts I want rather than digging around in a chest freezer, which can make holes in the plastic wrapping—something that you don’t want to do. Holes make for a big mess when you’re thawing the meat, and can introduce bacteria that will spoil it.
How to plan and thaw
If you have a spare refrigerator in your house or garage, you’re likely already using it for leftovers and beverages, but it’s also great for thawing meat. For example, each week, I place a few packages of frozen meat in a bowl at the bottom of my extra fridge so I have choices throughout the week for what to cook. Using a bowl is key because sometimes the meat can “leak” if there is a hole in the package, making a huge mess. This is also why it’s important—from a food safety perspective—to store any raw or thawing meat at the bottom of the fridge, below any food you’ll eat without cooking. Most cuts will defrost overnight in the fridge and be ready to cook by dinnertime.
When planning a meal, take a look at what cuts you have available, how much time you have and what vegetables are on hand and start from there. There will be occasions when you find yourself without any thawed meat and a hungry family to feed, so to quickly thaw it, place a package of plastic-wrapped meat in a large bowl in the sink and let it sit under cool water for 15–20 minutes. Never use a microwave! This process works well for a one-pound package of ground meat or steaks, but not for large roasts or whole chickens—for larger cuts, the slow thaw-in-the-fridge technique is ideal. Do be aware that sometimes quick-thawed ground meat can produce a more watery product, which will make meatballs or burgers less likely to keep their shape and may necessitate more binder. Drain the ground meat well before using if you find a lot of liquid at the bottom of the thawed package.
HOW TO COOK
Because grass-fed beef is leaner than grain-finished beef, it has a reputation for being dryer and chewier. This is where your cooking technique comes into play. When cooked properly, grass-fed steak has a richer, more “earthy” or “grassy” taste. Be aware that grass-fed beef also cooks differently than conventional meat. “Low-and-slow” cooking techniques—like brazing and stewing—are ideal for larger cuts.
When making steaks, you can either try an initial quick sear in a cast-iron skillet followed by a low-and-slow roast in the oven, or start the steak in the oven and finish it with a good pan sear. You’ll need about 30% less cooking time for grass-fed meat. Set your oven about 50° lower when using grass-fed beef if following a standard recipe, and CrockPots should be set on “low.” You should also allow meat to come to room temperature before cooking it, and let it rest for at least five minutes after cooking before slicing.

USEFUL EQUIPMENT
There are a few great kitchen tools that will make your life easier when cooking local meat:
A digital meat thermometer, such as a Thermapen. It’s really hard to cook a perfect steak if you don’t know what temperature it is. Consult a temperature chart that will instruct you on the proper temperature reading for type of meat, cut and desired doneness. Always remove the meat from your heat source just before it gets to the proper temperature to allow for “carry over” time, which can vary depending on the thickness of the cut.
A well-seasoned cast-iron skillet. I love my cast-iron skillets, and have a variety of shapes and sizes. You can even find antique pans at yard sales, which may need reconditioning, but they’re easy to get back into shape. Cast iron holds heat really well and creates the perfect sear.
A braising pan. This isn’t mandatory, because you can also braise in a Dutch oven or in a baking dish with a cover, but a braising pot does make the job easier. They’re basically a wide, enameled cast iron with tight-fitting lid that can go from stovetop to oven. These also tend to make a fantastic wedding gift!
A Dutch oven. For soups, stews and slow roasts, a Dutch oven is a great tool. I like enameled cast iron, and they come in a variety of really fun colors. Make sure the lid is oven safe. A Dutch oven will produce flavors that are much more concentrated and developed than in a slow cooker.
A slow cooker. If you really need to “set it and forget it,” or are someone who likes to let your food bubble quietly overnight and be ready to eat the next morning, an electric slow cooker is ideal.
An Instant Pot or programmable electric pressure cooker. This is my absolute favorite new kitchen gadget, and I use mine several times a week. It can function as a slow cooker if you like, but to me the best part of the Instant Pot is its pressure cooker feature. I can make a homemade broth—usually simmered for several hours or overnight on the stove—in about an hour. Pulled pork, stews, soups and perfectly cooked beets and potatoes take practically no time at all. The food also tastes great because you don’t need lots of liquid and the pressure concentrates the flavors. If you’re a foodie, you need this pot! Trust me.
A meat tenderizer (either a Jaccard or a raised-surface meat mallet). There’s a reason why every grandmother’s kitchen back in the day had either a meat mallet or a bottle of powdered enzyme tenderizer. Grass-fed beef—which all beef once was before feedlot grain finishing—will be tough when not treated right. Searing a grass-fed steak straight up in a pan will result in a dry and chewy piece of meat, but when you use one of these devices, it comes out great. You can easily make a really tough cut juicy and tender by either perforating the meat with a bladed Jaccard, creating tiny air holes which reduce cooking time, or disrupting the connective tissue by pounding it with a raised-surface mallet. A must for any local meat CSA shareholder.
Tongs. Don’t flip your meat with a fork, which allows the juices to run out of the meat before it’s had a chance to rest. Get yourself a few sets of tongs so that you treat your steak well.

STEAK FROM FROZEN: INITIAL SEAR, THEN SLOW ROAST METHOD
You read that right—this steak is cooked straight from frozen, without thawing. I really couldn’t believe it when I was told you could cook a steak like this with similar results to a reverse sear. I needed to see it for myself. But it really works! What a time saver for those of us who keep most of our steaks in the freezer. It comes out just like the reverse sear, looking like a sous vide steak, with no grey along the outer parts. It’s a total game changer!
1 (1-inch-thick) grass-fed rib eye, tenderloin or sirloin steak
¼ teaspoon coarse sea salt
1 teaspoon olive oil
Freshly ground black pepper
Preheat oven to 275° F. and place a cast-iron skillet over high heat. Add the salt and olive oil to the pan. Place the frozen steak on the pan, and after about 20 seconds, press down a bit to grind the salt into the meat. Sear a total of about 90 seconds per side, to achieve a nice brown coating, using tongs to flip.
Transfer the steak to a baking sheet with a wire rack and roast the steak until it reaches 125° F. for medium rare, about 20–25 minutes for a 1-inch steak. When the steak reaches optimum temperature, remove it to a cutting board and let it sit, covered, for 5 minutes. Season to taste with more salt and some freshly ground black pepper, slice and serve.
THE REVERSE-SEAR METHOD
This may sound counter-intuitive, but please have faith: It works, and is the best method for success every time. This method is ideal for lean, grass-fed steaks because with this “low-and-slow” method you’ll roast the meat in a low-temperature oven first—to get the meat to the exact temperature you want—then simply finish it off in a super-hot cast-iron pan to form a nice crust on the outside. This is very similar to how many restaurant chefs make perfect steaks using the sous vide method. Here’s how to do it:
2 grass-fed steaks, about 1 to 1½ inches thick
Sea salt
1 teaspoon olive oil
Freshly ground black pepper
Equipment:
Rimmed baking sheet lined with rack
Cast-iron skillet
Digital meat thermometer
Preheat oven to 250° F. and bring steaks to room temperature. Use a paper towel to remove excess moisture from the steaks, then sprinkle them liberally with salt and place them on the rack on the baking sheet.
Roast the steaks until the meat thermometer reads 125° F. for medium rare (about 40–45 minutes). Remove from oven.
Heat a cast-iron pan over high heat, add the oil and sear the steaks for about 1 minute per side, just long enough to brown. Remove the steaks from the heat, sprinkle with pepper and set aside for about 10 minutes before slicing and serving.
TENDERIZED STEAK WITH SOUTH ASIAN HERB SAUCE
Try this bright and fresh alternative to winter stews. Instead of marinating the meat, you’ll cook it first and then finish with a sauce. With grass-fed steak, tenderizing really helps. It can be done with a mallet or a Jaccard meat tenderizer, which has lots of tiny blades that pierce the steak. This sauce is fantastic over steak, but equally good for grilled chicken, fish, shrimp and even vegetables. Serve over a crisp salad with a side of rice.
1 (2-pound) grass-fed sirloin steak, about ½ inch to 1 inch thick
Sea salt, to taste
1 teaspoon olive oil
For the sauce:
1 small onion, coarsely chopped
3 cloves garlic, coarsely chopped
2 tablespoons sweet Asian chili sauce
3 tablespoons fish sauce
1 lime, zested and juiced
½ cup packed fresh basil
¼ cup packed fresh cilantro
¼ cup packed fresh mint
Equipment:
Food processor or blender
Jaccard meat tenderizer or mallet
Cast-iron skillet
Place the steak on a cutting board and trim away the outer fat. Pierce the meat all over with the Jaccard tenderizer until well punctuated, about 3 times in each spot. If using a mallet, pound the steak on both sides until the meat is perforated all over.
Dry the meat with a paper towel and sprinkle both sides lightly with salt. Heat a cast-iron pan, grill pan or outdoor grill to medium-high heat and add the oil, then place the steak on the pan. Sear the steak, flipping once. Depending on thickness, it should take 2–4 minutes per side for medium rare.
Remove the steak to a cutting board and allow to rest for 5 minutes. While the steak rests, place the remaining ingredients in a blender or food processor and purée until smooth. Slice the steak crosswise against the grain and serve with the sauce drizzled over it.
GRASS-FED MEATBALLS
Makes 24 meatballs
Grass-fed ground beef, with less fat than conventional beef, can sometimes be a bit dry when cooked through. The mushrooms and puréed parsley in this recipe make these meatballs moist without the need for breadcrumbs. Serve tossed with marinara sauce over creamy polenta topped with garlicky sautéed Swiss chard.
Since many local meat shares include all sorts of ground meats, I’ve included variations here for pork, turkey and lamb, along with suggested spices and added ingredients that go best with each meat.
Leftover meatballs make an excellent high-protein snack. Try serving the Cherry Tarragon Turkey Meatballs on toothpicks as an hors d’oeuvre. I also love meatballs as the protein on my salad for a quick lunch, or, for a warm and comforting soup, gently drop uncooked Lemon-Ginger Asian Pork Meatballs into some homemade chicken broth to simmer with some spinach and swirl of egg and a drizzle of sesame oil. Perfect winter food.
BASIC MEATBALLS
1 pound beef
2 pounds pork
8 ounces mushrooms, stemmed
2⁄3 cup parsley, packed
2 tablespoons granulated onion
¾ teaspoon salt
2 tablespoons tomato paste
2 teaspoons dried oregano
2 teaspoons dried thyme
Freshly ground black pepper
Preheat oven to 425° F. Line a baking sheet with parchment paper. Combine the meats in a large bowl and mix gently so as not to overwork. Place the rest of the ingredients in a food processor and pulse to form a chunky paste.
Mix the paste into the meat well, again being careful not to overwork, and form 24 golf-ball-sized meatballs. Place them, evenly spaced, onto the lined baking sheet.
Bake the meatballs for 20 minutes or until lightly browned.
Variations:
CURRY MEATBALLS
-Replace the parsley with cilantro.
-Omit the thyme and oregano.
-Add some madras curry powder and a pinch of red pepper flakes.
LEMON-GINGER ASIAN PORK MEATBALLS
-Use all ground pork.Add a little minced mint, basil and a little less parsley.
-Add grated ginger and a few teaspoons of grated lemon zest.
-Omit the thyme, oregano and tomato paste.
-Replace the salt with a dash of fish sauce and tamari (soy sauce).
MOROCCAN MEATBALLS
-Use ground lamb instead of beef and pork.
-Replace parsley with mint and cilantro.
-Instead of the oregano and thyme, use some freshly grated ginger and coriander.
CHERRY TARRAGON TURKEY MEATBALLS
-Use all ground dark meat turkey instead of beef and pork.
-Add minced bacon to the food processor for some extra fat.
-Omit the tomato paste, thyme and oregano.
-Add chopped, rehydrated dried cherries and fresh tarragon.