Tiny Greens Help Grow The Business
Photos by Adam Detour
Adorable is not a word usually associated with food, but it aptly describes microgreens. Who hasn’t been charmed by the tiny sprigs of arugula, basil or pea shoot, garnishes that lately seem to be on every restaurant plate? Microgreens have become the favorite embellishment for many chefs; they’re ubiquitous and cute.
Microgreens also have a serious side. They’re high in nutrients—more about that later—and have a low carbon footprint, because they require far less water than their big brother plants. Larissa Molina has cultivated and cooked with microgreens for three years. She regales visitors to her farmers market table of microgreens with a tutorial of their benefits.
“Microgreens give you such a quick return on your investment of time and effort,” says Larissa, who explains that they sprout in a matter of days. She also notes that the tiny plants pack a powerful punch of flavor. Bright red amaranth, for example, “has an earthy taste like spinach or beets,” and feathery corn microgreens “taste and smell just like big ears of corn,” Larissa says. On the other hand, kale as a microgreen, “just melts in your mouth. It doesn’t have the chewiness of the large leaf kale,” she says.
Larissa has experimented with microgreens in cooking, taking them beyond their usual role as a garnish. “I put pea shoots in chicken pot pie,” she says. Her daughter is a big fan of sunflower microgreens and eats them as an after school snack.
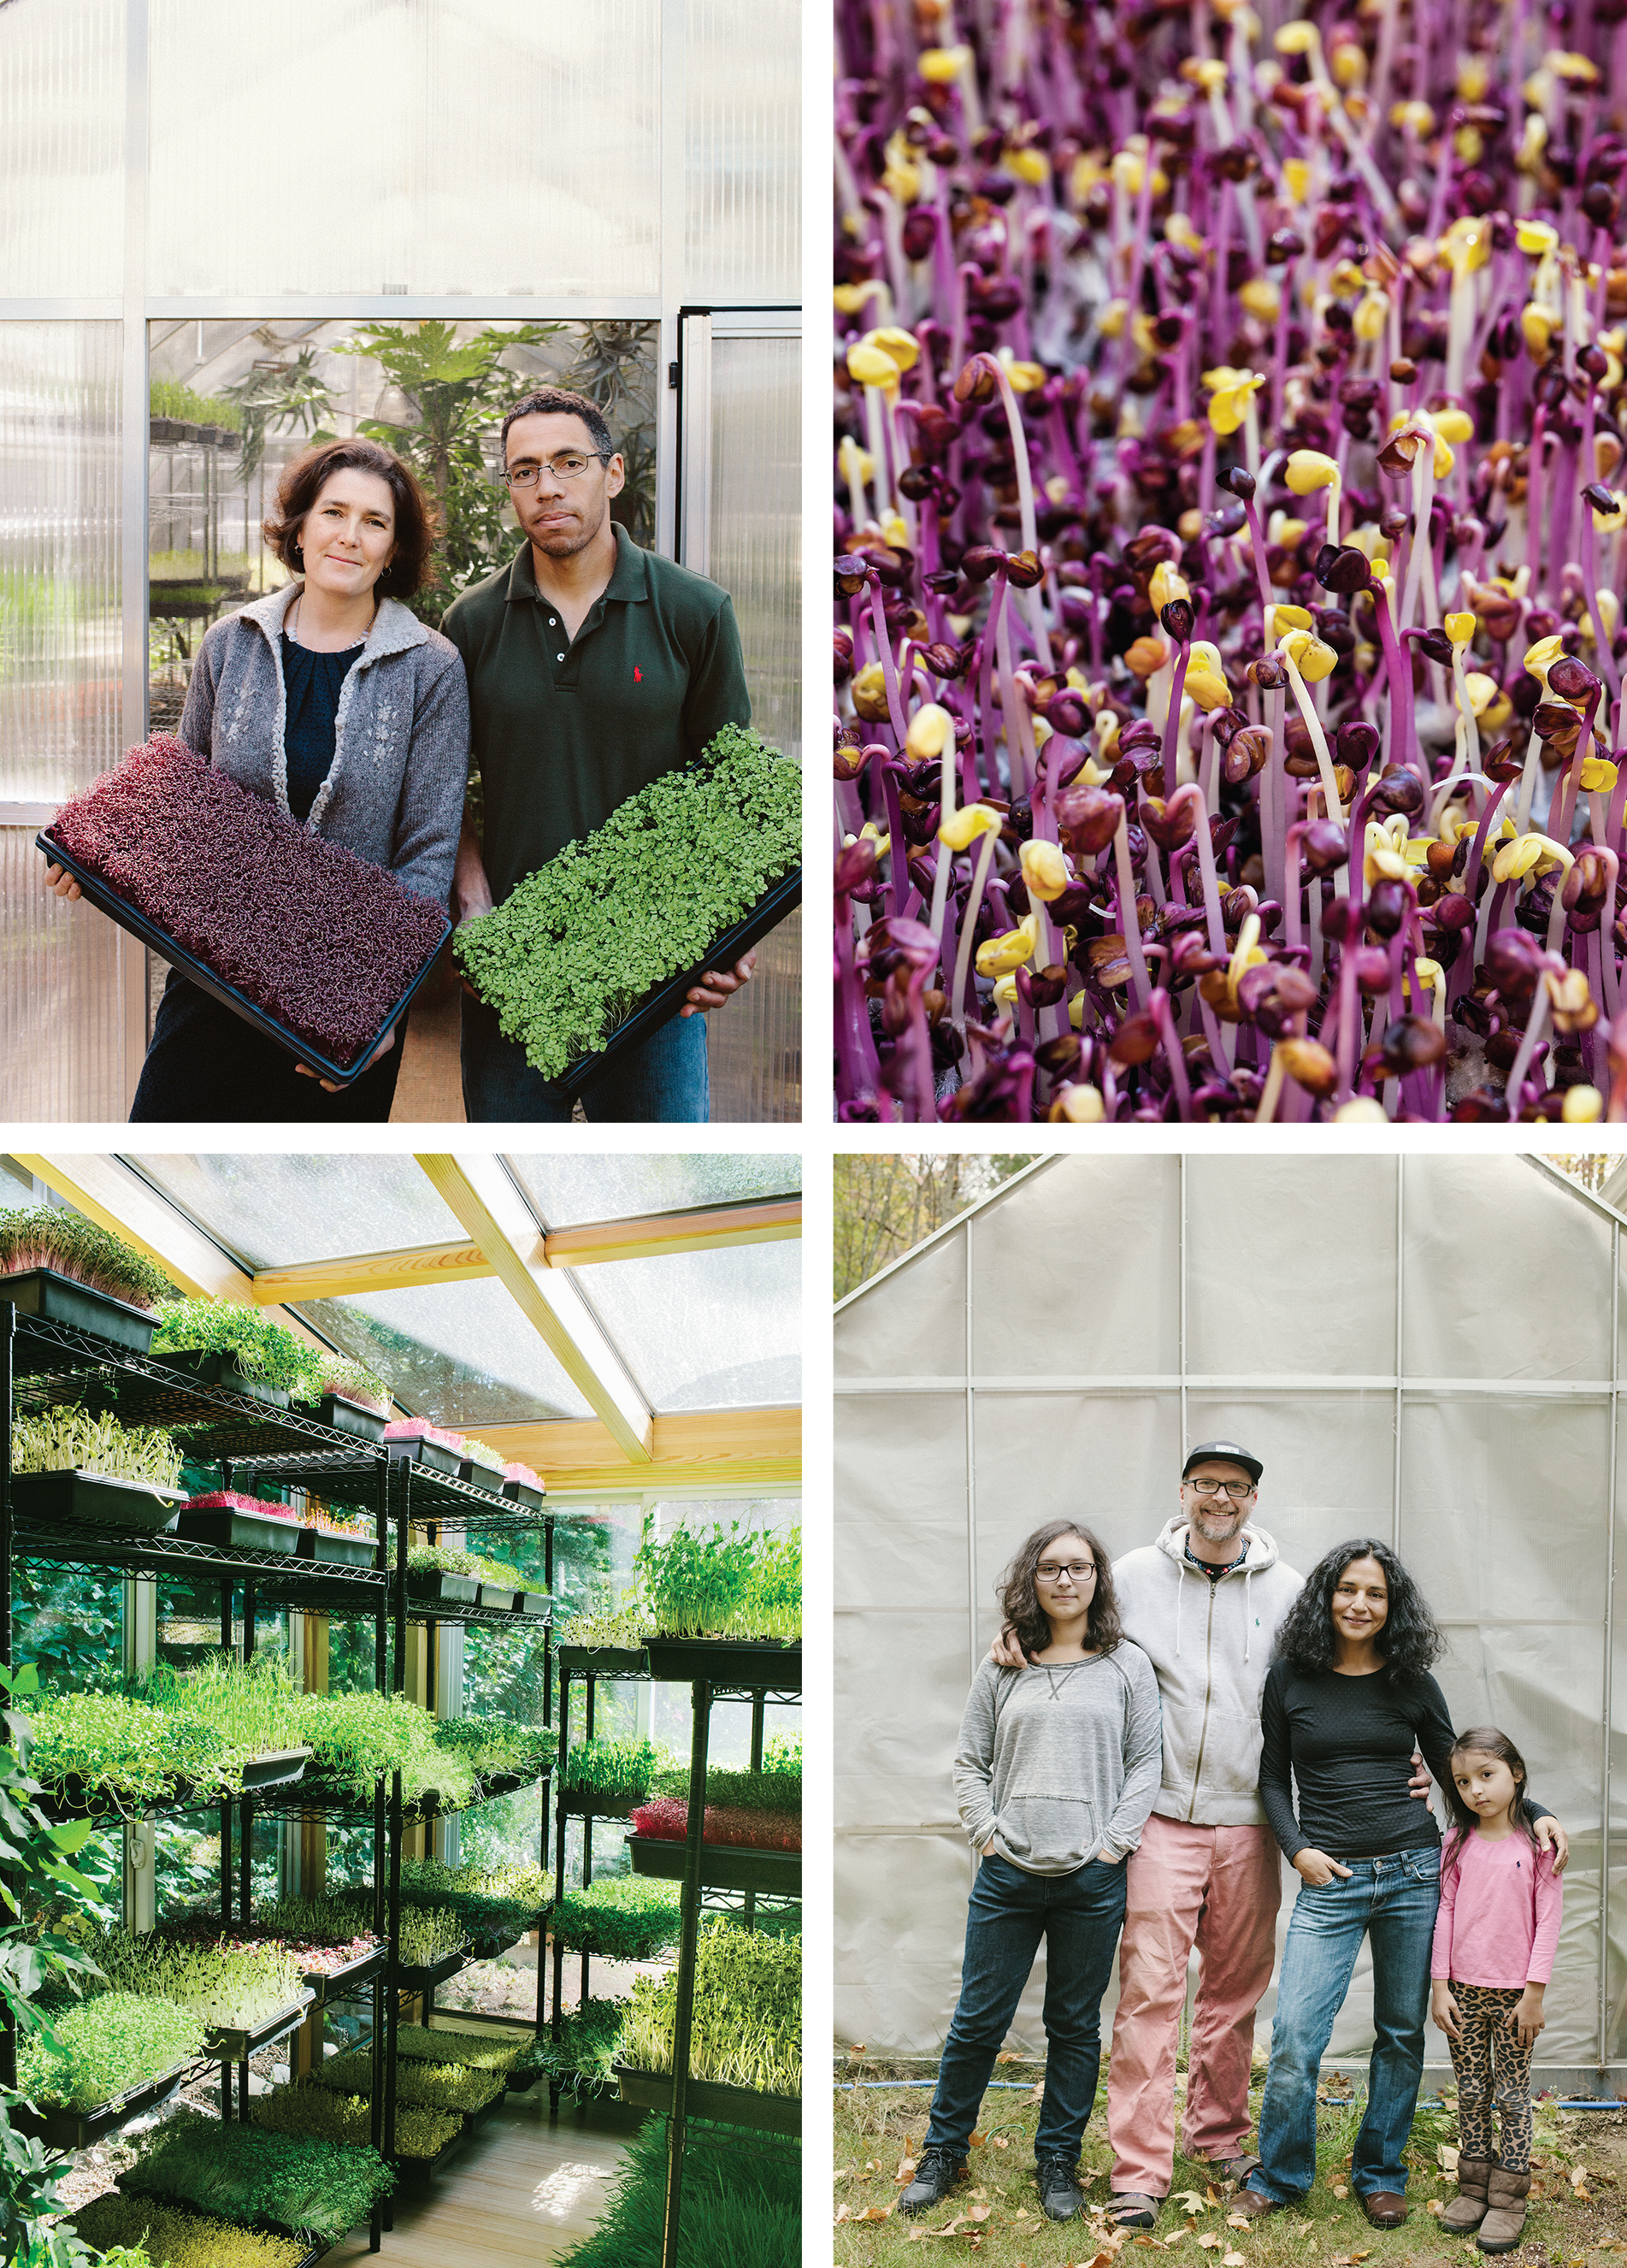
Her microgreens business, First Leaves Family Farm, was started from her home in Whitinsville. She and her husband, Ken Helinski, converted a section of the house’s lower level into a microgreen laboratory where shelves of tiny plants sprout under the warmth of grow lights. A 10-foot tent lined with Mylar houses hydroponic systems for micro herbs and baby basil plants. A smaller, black lined tent “holds microgreens that require a period of darkness for ideal taste and appearance.” The room is heated to 75°F and airflow is maintained with two 11,000 BTU ventilation units.
Larissa’s path to her microgreens business was circuitous. In the 1980s, her family came to the United States because of the war in El Salvador. She attended Boston University and graduated with a degree in manufacturing engineering. She also has a post-baccalaureate degree in visual arts from the School of the Museum of Fine Arts in Boston.
When Larissa was looking for a business to run after her youngest child started school, she discovered microgreens and read everything she could find about them.
A study published in the Journal of Agriculture and Food Chemistry, for example, found that several varieties of microgreens had higher levels of nutrients than mature leaves of the same plants.
As she grew her business Larissa concedes there was a lot of trial and error. “I’ve learned so much from watching the greens grow,” she says. Keeping careful and copious notes, she can accurately estimate the amount of time it takes her various crops to grow from seed to sale.
Larissa and Ken get their seeds from Johnny’s of Maine. Their source for soil and almost all of their equipment is a local store named Worm’s Way, one of a small chain of organic gardening supplies. The Sutton, MA store is only a couple of miles from Whitinsville. “Ken was at Worm’s Way so often,” Larissa notes, “he’s now the store manager.”
Larissa sells her microgreens at Worcester’s Canal District Farmers Market on Saturdays and the Marlboro Farmers Market on Sundays. Over the summer she also sold them at the Shrewsbury Farmers Market at Ward Hill. Little did she realize as a child in El Salvador, where open air markets are plentiful, that she would one day participate in farmers markets in New England.
The health benefits of microgreens also lured a couple of former public school teachers into the business of growing and selling them. Lisa Evans was introduced to microgreens at a workshop in Florida promoting the benefits of a raw, plant based diet. She came home with a selection of seeds and convinced her partner, Tim Smith, that they should turn their passion for healthy eating into a business.
Their venture, We Grow Microgreens LLC, is located in a sunroom and free- standing greenhouse extension of their home in Roslindale. There, they grow the tiny plants in 10 by 20-inch trays of organic soil under natural light. “We believe strongly that natural sunlight is the way to go,” Lisa says. Their microgreens grow in trays stacked on metal shelving; the south facing sunroom provides enough sunlight.
Lisa and Tim’s business plan accelerated last winter when they noticed a sign promoting the Wayland Farmers market at Russell’s Garden Center where they bought supplies. Lisa asked Peg Mallett, the market manager, if she could sell microgreens at the market. “Peg asked me what was our website; we didn’t have one,” Lisa says, “but within a week, I created a website, we incorporated as a limited liability corporation, and got insurance.”
That was in January 2015; now the couple can be found at farmers markets in Natick, Newton, Roslindale, Wayland, Jamaica Plain, and Milton. Some local retail markets are also carrying the greens: Volante Farms in Needham, Salvy’s Bacon Street Farm in Natick, and The Fruit Center in Hingham. As the business was growing, Tim left teaching to devote himself to it full time; Lisa still teaches on a part time basis.
The couple recently built a greenhouse in Maine where they will grow microgreens from April through October. The biggest challenge in growing microgreens is time, Lisa says. “It’s very labor intensive. Tim spends about 15 hours a day planting, watering, packaging, and selling at farmers markets.”
Initially they sold single varieties of basil, radish, buckwheat, broccoli and kale in 3½-inch clear plastic clamshells. By the end of summer they had many requests from customers for microgreens mixes, so now We Grow Microgreens sells mixes that contain up to seven varieties and seasonal edible flowers. The mixes are sold in 8-inch clamshells, similar in size to packaged salad greens.
Among their varieties are: sunflower, kale, broccoli, radish, arugula, watercress, micro chives, and edible flowers such as gem marigolds, nasturtiums, violets, and Johnny Jump Ups.
Lisa and Tim have made a few inroads with area chefs; you’ll find their microgreens garnishing plates at Walnut Grill in Newton, Masona Grill in West Roxbury, and Hojoko in Boston.
“Chefs are very familiar with microgreens, but they tend to use them as garnishes,” says Lisa. “We’d like to find a chef who’s also willing to use microgreens as principal ingredients.”
First Leaves Family Farm
508.266.0305
facebook.com/firstleavesfamilyfarm
We Grow Microgreens
617.877.0465 Cell Tim
617.792.5424 Cell Lisa
Grow Your Own Microgreens
Microgreens are relatively easy and inexpensive for home cooks to grow in their own kitchens.
“You can set yourself up with everything you need for about $50,” says Ken Helinski, who owns First Leaves Family Farm, a microgreens business, with his wife, Larissa Molina.
Ken recommends a grow light—a T-5 fluorescent fixture available for under $30—as few home kitchens provide enough sunlight to nurture the tiny plants. A bag of organic potting soil is less than $10. Shallow pans such as disposable pie pans or Styrofoam takeout boxes (wash first to make sure they’re clean) are good containers for microgreens. Be sure to poke some holes in the bottom for drainage. Place the containers on a tray.
Microgreen seeds can be found online at sites such as johnnysseeds.com or highmowingseeds.com. Choose a singular plant such as arugula, basil, or kale or mixtures; both spicy and mild combinations of greens are available.
Pour about an inch or two of soil in the container and smooth it flat with your hand. Sprinkle on a thick layer of seeds—about 10-12 seeds per square inch for small seeds and 6-8 per inch for larger seeds according to Johnny’s of Maine—and press them gently into the soil. Mist with water from a spray bottle or cover the surface with a clear lid until the seeds germinate. Be careful to keep the soil moist but not soaked.
Your seeds will need either direct sunlight or a grow light for at least four hours a day. Make sure there’s airflow around the seed containers to prevent disease and mold; a small fan should be sufficient.
Within a few days to a week, seeds will begin to sprout. Depending on the variety of green, they can be harvested—clipped with scissors—in one to three weeks after leaves begin to appear. After harvesting, you’ll need to replace the soil for successive plantings. To avoid contamination, don’t re-use it. Instead, recycle the soil by adding it to your compost.
This story appeared in the Winter 2016 issue.